Window sills are often overlooked during routine cleaning, yet they are prime collectors of dust, dirt, pollen, and even moisture, making them prone to unsightly grime and mold. A clean window sill can make a surprising difference to the overall brightness and freshness of a room. Learning how to clean window sills effectively, with a simple step-by-step process, will ensure they are spotless, hygienic, and enhance your home’s appeal.
Supplies you’ll need
Before you begin, gather these essential tools and cleaning agents. Having everything on hand will make the process much more efficient.
- Vacuum Cleaner with Crevice Tool: Indispensable for sucking up loose dirt, dust bunnies, and debris from tight corners.
- Stiff-Bristle Brush or Old Toothbrush: Perfect for scrubbing stubborn grime and getting into crevices.
- Microfiber Cloths: Have at least two or three clean ones – one for cleaning, one for rinsing, and one for drying.
- Small Bucket or Spray Bottle: For mixing and applying cleaning solutions.
- Warm Water: The base for most gentle cleaning solutions.
- Mild Dish Soap (pH-neutral, clear): Effective for general dirt and grime.
- White Distilled Vinegar: A powerful natural degreaser and disinfectant, especially good for mold.
- Baking Soda: A gentle abrasive for tough spots and a natural deodorizer.
- Melamine Foam Sponge (e.g., Magic Eraser): Excellent for removing scuff marks and stubborn stains on painted or vinyl sills (use gently, testing first).
- Gloves: To protect your hands, especially when dealing with mold.
- Safety Goggles (Recommended): If cleaning significant mold or using stronger solutions.
How to remove dust and debris
Always start with dry cleaning. This prevents dust from turning into muddy streaks when you introduce liquid.
- Clear the Sill: Remove any items from the window sill, such as plants, decorations, or blinds/curtains if they obstruct access. This allows you to reach the entire surface.
- Vacuum Loose Debris:
- Attach the crevice tool to your vacuum cleaner.
- Carefully run the crevice tool along the entire length of the sill, paying close attention to corners, grooves, and the track where the window slides.
- Vacuum up any loose dust, dirt, dead insects, pollen, or crumbs. This step is crucial for preventing streaks later on.
- Brush Stubborn Dry Dirt: For any dry dirt clinging to textured surfaces or wedged into tight spots that the vacuum can’t reach, use a dry, stiff-bristle brush or an old toothbrush to loosen it. Immediately vacuum up the dislodged dirt.
Deep cleaning stains and mold
Once all loose debris is gone, it’s time to tackle stains, grime, and any mold. The cleaning solution will depend on the severity and type of grime.
- Prepare Your Cleaning Solution:
- For General Grime: Mix a few drops of mild dish soap in a bucket of warm water. This is safe for most sill materials.
- For Tougher Grime, Hard Water Stains, or Minor Mold: Mix equal parts white distilled vinegar and warm water in a spray bottle.
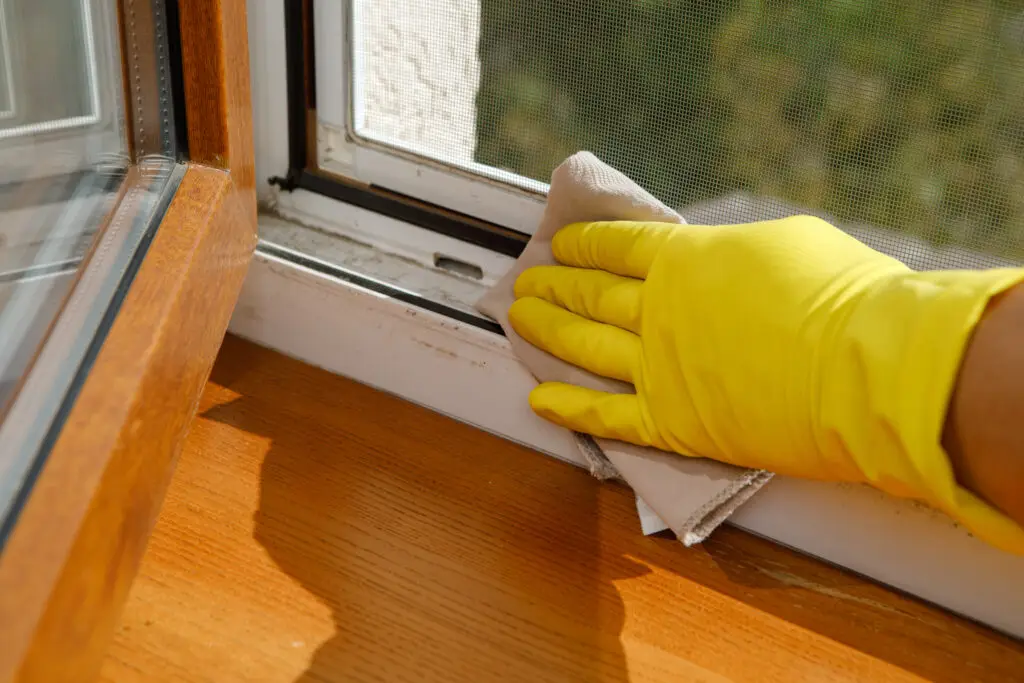
- Apply and Scrub:
- Dampen a microfiber cloth or soft sponge with your chosen cleaning solution, wring it out well to ensure it’s not dripping wet.
- Wipe down the entire window sill. For stubborn spots, spray the solution directly onto the spot (if using a spray bottle), let it sit for 5-10 minutes to loosen, then scrub gently with your stiff-bristle brush or old toothbrush.
- For scuff marks on painted or vinyl sills, gently rub with a slightly dampened melamine foam sponge.
- Address Mold Specifically (If Present):
- If you encounter mold, use the white vinegar and water solution (or undiluted white vinegar for heavier mold). Spray generously onto the mold.
- Let it sit for at least 15-30 minutes. Vinegar needs dwell time to effectively kill mold spores.
- Scrub the mold away with your stiff-bristle brush.
- Caution: If mold is extensive, or if you opt to use a diluted bleach solution (1 part bleach to 10 parts water) on non-porous surfaces, wear gloves and ensure excellent ventilation. Never mix bleach with vinegar or any other cleaner.
- Rinse Thoroughly:
- Dampen a separate, clean microfiber cloth with plain water (no soap or cleaner).
- Wipe down the entire sill again to remove all cleaning solution residue. You might need to rinse and wring the cloth multiple times to ensure all residue is gone.
- Dry Completely:
- Immediately use a third, dry microfiber cloth to thoroughly dry the entire window sill. Do not let it air dry, as this can lead to water spots or, more importantly, moisture damage on wood and encourage mold growth on any material.
- For quick drying, you can also use a fan.
Tips for different window sill materials
While the steps are similar, keep these material-specific nuances in mind:
Wood sills (painted, stained, or varnished):
- Moisture is the Enemy: Always wring out cloths very well and dry immediately. Excess water can cause warping, swelling, or damage to the finish.
- Gentle Cleaners: Stick to mild dish soap or a dedicated wood cleaner. Avoid harsh abrasives or strong acidic/alkaline cleaners.
- Conditioning: After cleaning, consider applying a wood furniture polish or conditioner to protect the finish and add shine.
Vinyl sills:
- Durable: These are generally robust and can handle a bit more scrubbing.
- Melamine Foam Sponge: Excellent for removing embedded dirt and scuff marks.
- Prevent Water Spots: Always dry completely after cleaning, as water spots can be noticeable on vinyl.
Aluminum sills:
- Spotting: Can show water spots easily. Dry immediately.
- Oxidation: If the aluminum looks dull or has white powdery spots (oxidation), a mild acid like diluted white vinegar can sometimes help, or you might need a specialized aluminum cleaner/polish. Avoid abrasive pads.
How often should you clean window sills?
The frequency of cleaning depends on several factors:
- Monthly (Routine): For most homes, a quick vacuum and damp wipe every month will prevent significant buildup.
- Quarterly (Deep Clean): A thorough deep clean, including tackling any stains or mold, should be done quarterly (every three months) during your seasonal cleaning routine (e.g., during spring cleaning, mid-summer, fall, and winter).
- As Needed: If you notice significant dust, spills, or pet nose prints, clean them immediately. If windows are open frequently (e.g., in summer), sills might need more frequent dusting.
- Humid Climates: In areas with high humidity, or during damp seasons, checking for and wiping away condensation daily, and treating for mold more frequently, is crucial.
By integrating these systematic steps and material-specific tips into your cleaning routine, your window sills will always be spotless, enhancing the overall cleanliness and appeal of your home.
Tired of battling dirty window sills? Let the experts bring a spotless shine to every corner of your home! Contact Maid Cleaning For You today for professional home cleaning services that ensure your entire home sparkles, from top to bottom!