Deep cleaning changes how your home feels. It clears grime you stopped seeing, reduces odors that linger, and makes daily tidying easier because every surface starts fresh.
If you’re comparing DIY vs. professional deep cleaning, it helps to know what matters most: a clear scope, the right tools, safe products, and a room-by-room method that doesn’t miss the hidden buildup.
Way 1: Deep cleaning starts with a smart scope (and fewer surprises)
Deep cleaning works best when you define “done” before you start. Otherwise, you may scrub hard yet still feel like nothing changed.
So, what does deep cleaning include? In most homes, deep cleaning targets buildup in high-touch areas, edges, and overlooked zones—plus detail work you skip during routine cleanups.
A practical deep cleaning scope often includes:
- Baseboards, door frames, and light switches
- Interior glass, tracks, and window sills
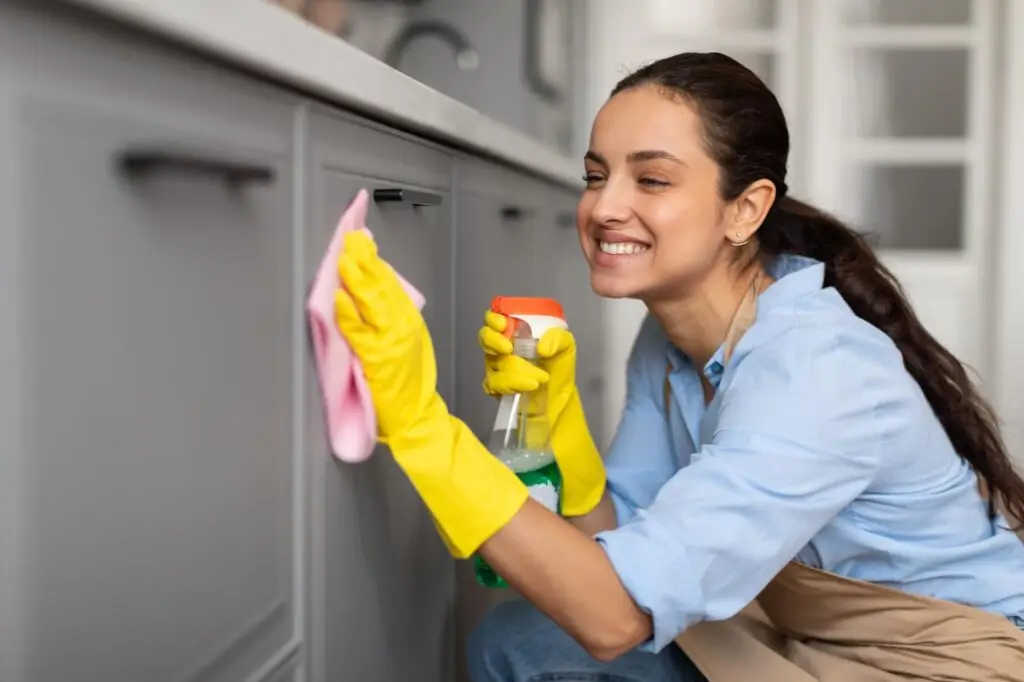
- Cabinet fronts and high-touch handles
- Bathroom tile lines, grout attention, and fixture polishing
- Kitchen degreasing (backsplash, stovetop edges, hood exterior)
- Dust removal from vents, fans, and reachable ledges
- Behind/under accessible furniture (as safe and reasonable)
However, deep cleaning does not automatically mean “restore everything.” For example, heavy mold remediation, biohazards, or smoke restoration usually require specialized services.
To keep deep cleaning efficient, choose one of these scopes:
- Whole-home reset: best before guests, holidays, or seasonal changes
- Problem-area focus: best for kitchens, bathrooms, and entryways
- Detailed cleaning for new home: best before moving in furniture and pantry items
Because clarity prevents wasted time, write your “must-do” list first, and then add “nice-to-do” tasks only if time allows.
Way 2: Use the right sequence (top-to-bottom, dry-to-wet)
Deep cleaning gets easier when you follow a repeatable order. If you wipe counters first and dust later, you’ll redo work. Instead, move in a way that protects your progress.
A reliable deep cleaning sequence:
- Declutter surfaces (remove items, don’t clean around them)
- Dry dust high areas (fans, vents, ledges)
- Detail edges (baseboards, trim, corners)
- Wet clean (spray, dwell time, agitate, wipe)
- Floors last (vacuum, then mop)
Meanwhile, keep doors open for airflow and move room-by-room to avoid “half-clean everywhere.”
If you’re weighing professional deep cleaning, this sequencing is one reason pros move fast. They don’t just clean harder—they clean in an order that prevents backtracking.
Way 3: Upgrade your tools to “detail-level” (small tools, big change)
Deep cleaning isn’t only about products. It’s also about contact—getting bristles or microfiber into seams, corners, and textured surfaces.
Build a simple deep cleaning kit:
- Microfiber cloths (separate colors for kitchen vs. bathroom)
- A soft detail brush (for grout lines, faucet bases, hinges)
- A crevice tool + vacuum attachments
- A plastic scraper (for safe, gentle residue lifting)
- A mop that can reach edges (flat mop or microfiber head)
In addition, set a timer for each zone. When you time-box deep cleaning, you stay focused and avoid perfection spirals.
Where detail tools make the biggest difference
- Around faucets and drain rings
- Stovetop seams and burner edges
- Shower door tracks and corners
- Baseboards behind doors
- Cabinet hardware and trim grooves
As a result, your home looks cleaner even if you didn’t “do everything,” because the eye notices edges first.
Way 4: Deep clean the kitchen by attacking grease (not just crumbs)
Kitchen deep cleaning is often the most transformational because grease acts like glue. It holds dust, darkens surfaces, and creates that dull film that routine wiping doesn’t remove.
For safer product selection, many people prefer products recognized by the EPA Safer Choice program because it helps you compare ingredients and reduce harsh exposures in everyday use.
A kitchen deep cleaning method that works:
- Start with degreasing dwell time: spray, then wait a few minutes
- Agitate: use a non-scratch pad or soft brush on textured areas
- Rinse/wipe fully: leftover cleaner can attract more soil
- Finish dry: buff stainless or glossy surfaces to prevent streaks
Don’t skip these high-impact deep cleaning targets:
- Range hood exterior and surrounding wall area
- Backsplash edges and grout lines
- Cabinet fronts around handles (fingerprint zones)
- Trash can lid, rim, and the floor around it
- Small appliances you touch daily (toaster knobs, kettle handle)
“What does deep cleaning include” in the kitchen?
A comprehensive cleaning approach usually includes:
- Hand-wiping reachable cabinet fronts
- Detail cleaning around sink fixtures and soap buildup
- Spot-cleaning walls near cooking zones
- Vacuuming crumbs from corners before mopping
Therefore, if your goal is visible transformation, prioritize grease zones over “perfectly organized drawers.” Organization helps, but deep cleaning removes the film that makes everything feel sticky.
Way 5: Deep cleaning bathrooms means removing buildup safely
Bathrooms reward intensive home cleaning service methods because buildup layers fast: soap scum, hard water spots, body oils, and humid air residue. Still, bathroom deep cleaning should be careful and controlled.
A safe, effective pattern:
- Ventilate first (fan on, window open if available)
- Apply product and wait (dwell time beats aggressive scrubbing)
- Scrub details second (grout lines, corners, tracks)
- Rinse completely (no slippery residue)
- Dry and polish (fixtures, mirrors, glass)
For disinfecting steps, align with evidence-based guidance such as the CDC cleaning and disinfecting recommendations, especially when someone in the home is sick.
Bathroom deep cleaning details people miss:
- The base of the toilet and the floor behind it
- Shower door tracks and the lower corners
- Under-sink cabinet floor (leaks leave residue)
- Exhaust fan cover (dust + moisture paste)
- Light switch plates and door handles
However, avoid mixing chemicals (especially bleach with acids or ammonia). Deep cleaning should improve your home, not create fumes or risks.
Way 6: Go beyond “surface dusting” with a dust-and-air rese
Deep cleaning feels different when the air feels lighter. That often comes from removing fine dust where it collects and recirculates.
Targets for a more comprehensive cleaning reset:
- Ceiling fan blades (use a damp microfiber to capture dust)
- Vent covers (vacuum first, wipe second)
- Top edges of doors and picture frames
- Lampshades and window sills
- Upholstery seams and mattress edges (vacuum with attachments)
In addition, work in a “containment mindset.” Vacuum before you wipe, and fold cloths to trap dust rather than spread it.
A simple “dust control” mini-checklist
- Vacuum with attachments first
- Wipe high-to-low with lightly damp microfiber
- Replace or wash cloths before they smear
- Finish with floors last
As a result, deep cleaning stops being cosmetic and starts feeling like a full reset.
Way 7: Treat floors like the finish line (the right method per material
Floors show the results of deep cleaning immediately. They also hold onto residue, so they need the correct method for the surface type.
Use this deep cleaning floor flow:
- Vacuum slowly (especially edges and under overhangs)
- Detail corners with a crevice tool
- Mop with the right moisture level (not soaking)
- Rinse/refresh water as it turns cloudy
- Let it dry fully before walking through
Match your deep cleaning approach to the floor
- Tile: focus on edges, textured areas, and grout lines
- Laminate: use minimal water; avoid soaking seams
- Hardwood: use a wood-safe cleaner and a damp—not wet—mop
- Vinyl/LVP: remove stuck-on residue gently, then rinse-wipe
Meanwhile, don’t forget the baseboards. Clean floors next to dirty baseboards can make a room look unfinished, even after deep cleaning.
Professional deep cleaning vs. DIY: how to compare thoughtfully
If you’re in “commercial investigation” mode, compare options with a checklist. A professional deep cleaning can be worth it when time is limited, mobility is a concern, or the home needs a full reset before a major event.
When comparing an intensive home cleaning service, look for:
- A clear task list (what’s included and what’s excluded)
- A realistic time estimate for your home size and condition
- Product options (especially if you have sensitivities)
- A plan for fragile surfaces (stone, specialty finishes)
- Consistent quality controls (checklists, rework policy)
Questions that clarify value fast:
- “What does deep cleaning include in kitchens and bathrooms?”
- “Do you detail baseboards, door frames, and reachable vents?”
- “How do you handle heavy grease or hard-water buildup?”
Therefore, you’re not just comparing price. You’re comparing scope, technique, and predictability.
Detailed cleaning for new home: a simple pre-move checklist
Detailed cleaning for new home situations works best before furniture and boxes arrive. That way, you can reach every corner without obstacles.
A strong deep cleaning pre-move focus:
- Inside cabinets and drawers (vacuum crumbs, then wipe)
- Closets, shelves, and baseboards
- Bathroom fixtures and shower corners
- Kitchen degreasing and sink sanitation
- Window sills, tracks, and interior glass
- Floors, corners, and entry thresholds
In addition, take photos of any existing damage before you start. That keeps your cleaning goal clear: reset the space, not “repair” it.
The “maintenance bridge” after deep cleaning (so it stays transformed)
Deep cleaning feels amazing, yet it can fade fast if you return to a random routine. The trick is to create a small maintenance plan that protects your results.
Try this simple rhythm:
- Daily: quick wipe of kitchen and bathroom touchpoints
- Weekly: floors + bathroom refresh
- Monthly: edges, vents, and a rotating detail zone
- Quarterly: mini deep cleaning of one major area (kitchen or bathrooms)
Meanwhile, keep your supplies easy to reach. If they’re buried, you’ll delay small cleanups until they become big ones.
A realistic maintenance mindset:
- Clean “before it looks dirty” in the highest-use zones
- Reduce grease with faster stovetop wipe-downs
- Handle spills right away to prevent staining or stickiness
As a result, you’ll need fewer marathon sessions and get more benefit from every deep cleaning.
The Fresh-Start Finish
Deep cleaning works because it targets what routine cleaning skips: buildup, edges, and the hidden zones that change how a home looks and feels. When you define the scope, follow the right sequence, and focus on kitchens, bathrooms, dust zones, and floors, deep cleaning becomes a practical system—not an overwhelming project.
What room are you planning to tackle first—kitchen, bathrooms, or the whole-home reset?