Your keyboard is one of the most used items in your home or office, and it can quickly become a collection of dust, crumbs, and germs. A clean keyboard not only looks better but also functions better and is more hygienic. Whether you’re dealing with a simple layer of dust or sticky, unresponsive keys, there’s a cleaning method for you.
When Keyboard Keys Need Cleaning
Dirt, Crumbs, and Sticky Residue
Dust, food crumbs, and pet hair can easily get trapped between your keys, making them feel sluggish or even preventing them from working properly. Spills of soda or coffee can create a sticky residue that causes keys to stick or feel “gummy” when pressed.
Hygiene and Germ Concerns
Studies have shown that keyboards can be dirtier than a toilet seat. They are a breeding ground for germs and bacteria. Regular cleaning is essential for personal hygiene, especially if you share your keyboard with others.
Cleaning Without Removing Keys
For a quick and effective clean, you don’t always need to take the keyboard apart.
Compressed Air for Debris
This is the fastest and easiest way to remove loose debris.
- Power Off: Make sure your device is turned off and unplugged.
- Shake It Out: Turn the keyboard upside down and gently shake or tap it to dislodge loose crumbs.
- Blast with Air: Use a can of compressed air. Hold the can upright and spray in short, controlled bursts between the keys, working from one side to the other. This blows out the debris that’s trapped underneath.
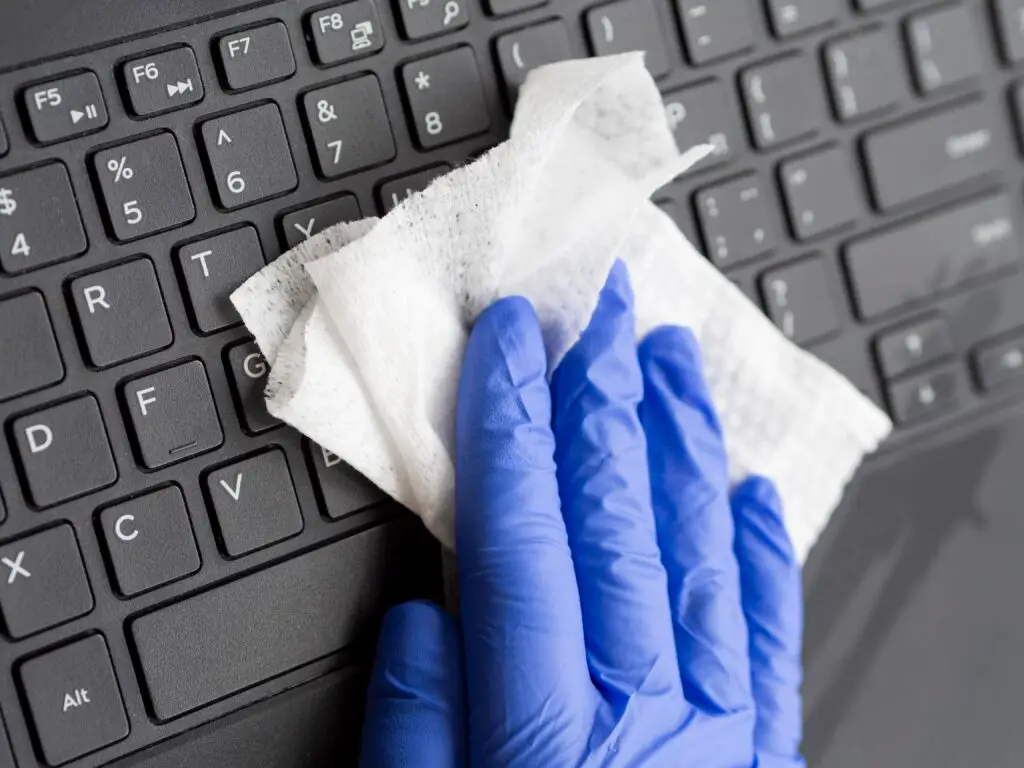
Alcohol Wipes for Surface Cleaning
To clean and sanitize the surface of the keys, use a disinfectant wipe that is safe for electronics.
- Damp, Not Dripping: The wipe should be damp, not soaked. Wring it out if necessary to avoid excess liquid.
- Wipe Down: Gently wipe the top and sides of each key, as well as the surrounding keyboard surface. For hard-to-reach areas, a cotton swab lightly dampened with isopropyl alcohol is a great tool.
Deep Cleaning by Removing Keys
For a more thorough clean, especially for mechanical keyboards or keyboards with sticky keys, you may need to remove the keycaps. Note: This process is best for desktop keyboards. Removing keys on a laptop keyboard is more difficult and can easily cause permanent damage.
How to Safely Pop Off Keycaps
For mechanical keyboards, a keycap puller is the safest tool. For others, a small, flat plastic tool can be used.
- Take a Photo: Before you start, take a picture of your keyboard’s layout so you can remember where each key goes.
- Gentle Pressure: With a keycap puller, slide the wires under the keycap and pull straight up. For non-mechanical keyboards, gently pry up a corner of the key with a plastic tool.
- Be Careful: Be extremely gentle, as the small plastic clips and hinges underneath the keys are fragile and can break easily.
Cleaning with Soap and Water
Once the keycaps are off, you can give them a proper wash.
- Soak: Place all the keycaps in a bowl of warm, soapy water with a small amount of dish soap.
- Wash and Scrub: Let them soak for about 30 minutes, then scrub them with an old toothbrush to remove stubborn grime.
- Rinse and Dry: Rinse them thoroughly with clean water. The most important step is to let them dry completely before putting them back on the keyboard.
Reattaching Properly
To put the keys back on, simply line them up with the clips or switches and press down until you hear a small click. Refer to the photo you took earlier to ensure they are in the correct place.
Maintenance Tips
Regular Quick Cleanings
Don’t wait until your keyboard is a mess. A quick daily wipe-down and a weekly blast with compressed air will prevent the need for a major deep clean.
Using Keyboard Covers
A clear, flexible keyboard cover is a fantastic way to prevent dust, crumbs, and liquids from ever reaching your keys. It’s an inexpensive solution that provides great protection.
FAQs
Is it safe to remove laptop keys?
It is generally not recommended to remove laptop keys. They are far more delicate than desktop keyboard keys and are often held in place by fragile scissor-switch mechanisms that can easily break. For laptops, it’s best to stick to compressed air and gentle surface cleaning.
What’s the best cleaner for keyboards?
A microfiber cloth and isopropyl alcohol (70% or higher) are the best cleaning tools. The cloth is gentle on surfaces, and the alcohol is a powerful, fast-drying disinfectant. For physical debris, compressed air is the most effective solution.
Need more than just a keyboard clean? Maid Cleaning For You provides professional cleaning services for every part of your home, ensuring your spaces are not only clean but also healthy and hygienic. Contact us today for a free estimate!